Preface: I wrote this series of articles to show how to get excellent results in body work with simple tools. It's intended to be a guide for the novice body worker trying to save money, and covers only surface preparation prior to painting. Not everybody can afford the big air compressor and special tools associated with this kind of work for what may be a one time job. I'm into my third full restoration and sixth paint job, and still prefer to keep it simple. I hope this little piece will help someone because any day I can help someone is a good day for both of us. Click here to see all articles in this series
- John D. Weimer
Tools for Automotive Painting
Now, its on to painting the jambs.
You can spend all the money you want on tools to paint with, but this is all you need.
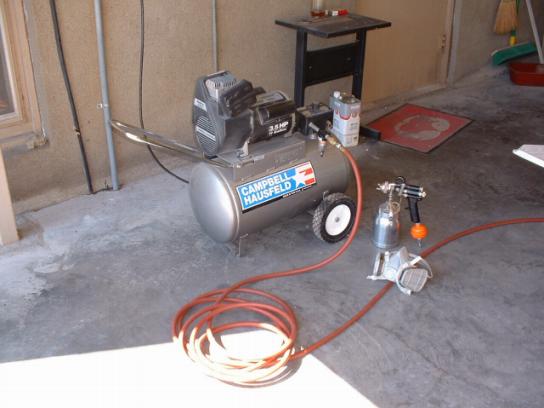
Inexpensive automotive painting setup: Compressor, paint gun, safety mask, air hose, moisture trap
- A compressor that can produce at least 8 cubic feet a minute flow at 40 PSI with a 20 gallon tank. Horsepower and compressor type don't matter, the above specs do. This little compressor won't keep up with any air sander, but it will a paint gun or any pneumatic powered wrench in a home tool box.
- The paint gun is a cheap copy of a Binks #7; this and a similar model DeVilbis were the standard paint guns for over 30 years. Sure they produce more overspray than a new HVLP gun, but what do you want to save; a hundred bucks on a paint gun or 2 ounces of paint per gallon? You can shoot any type of primer or paint with this old style gun by making minor adjustments instead of changing the spray head.
- The orange bulb at the air inlet is an air filter/moisture trap and they work like a charm.
- The mask is a common 3M type, costs about $20.00 and new filters are cheap at most auto parts stores.
- The air hose is a light painter's model. You don't need a heavy hose that can hold 350psi for a compressor that produces no more than 120psi. A light hose while painting is a definite advantage.
Painting Door & Hood Jambs
And, here, boys and girls, is a painted door jamb.
Note the overspray: it was intentional. The object is to paint the jamb and coat the entire edge of it.
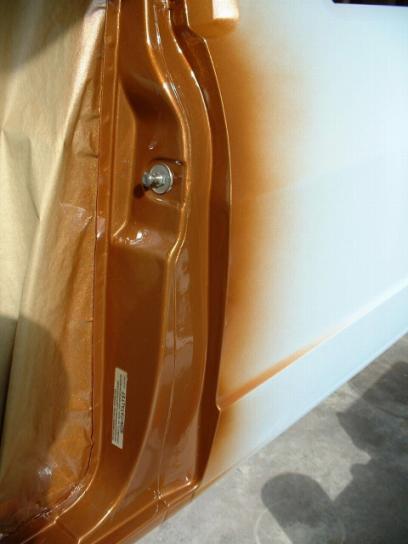
Door jamb masked and painted
The overspray will sand off easily, and we'll go on from there. The sanding technique will be explained later.
Notice below the "loose" masking around the engine bay below. That was to make sure the edges got painted, and I learned something here. I should have sanded the primer and masked on back another inch from where I did. This paint has terrific build and I came up with a masked edge about as thick as 5 sheets of paper. If I had moved back another inch it would have made feathering the overspray into the primer much easier. I knocked the edges down with 120 dry paper wrapped on a stick; more sanding later.
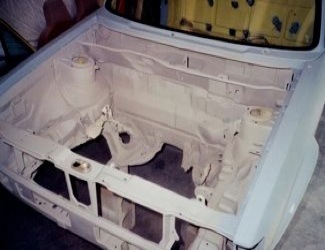
Engine Bay Before Paint |
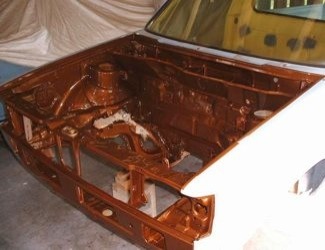
Engine Bay Painted |
Jambing is finished; and, it all turned out quite well.
You get really up close and personal with your painting in an area like this. I was in that hole not once, but three times blowing paint in crannies and behind areas you can't even see in the photos. That air intake box across the firewall was especially tight and was blow and go all the way. I was amazed at how forgiving the clear coat was and how it flowed out slick everywhere.
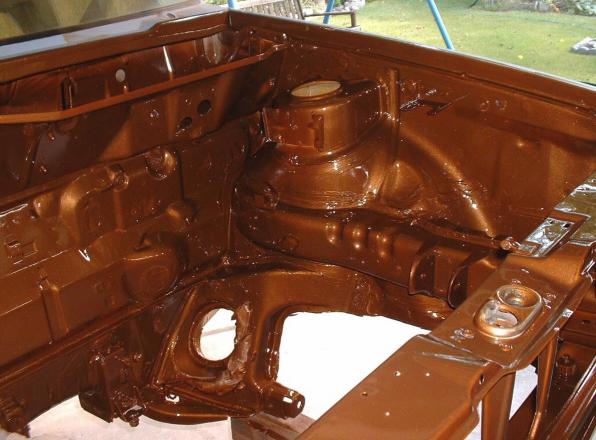
Painted engine bay, strut towers, air intake, and all the other nooks and crannies
In spite of crawling under and up into the engine bay 3 times, shooting up, down, sideways, and all around I never once got into the paint. MGBs are much easier, just walk around outside, you could even tap dance while doing one of them.
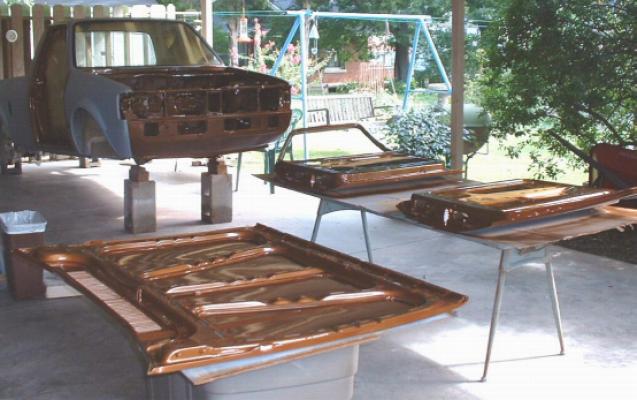
Painted jambs, engine bay and hood. Note the bolts installed in the hood
Fixing Paint Runs and Overspray
There is only one run, in the clear coat, that needs to be fixed and it's in an easy place to work that is normally hidden. Carefully finger and block sand off the run finishing up with 1500 grit paper and compound buff that spot. Only 4 tiny bugs are immortalized in the paint. Two in an obscure area in the hood where they will remain entombed and two on the inside of the left door. The two on the door can be easily removed, the clear coat touched up with an artist brush, 1500 sanded, and finger buffed with polishing compound.
We're coming down to the wire now and one unattended flaw, anything unnoticed is going to stick out like a sore thumb in the finish coat.
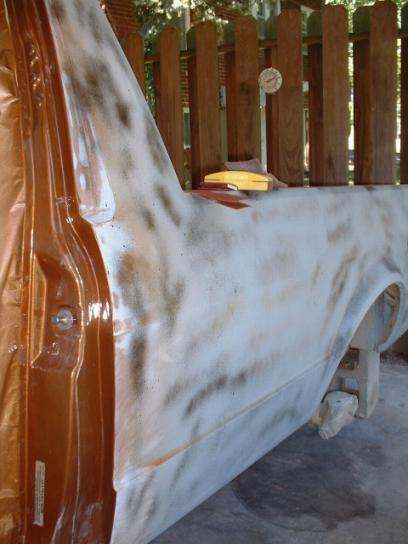
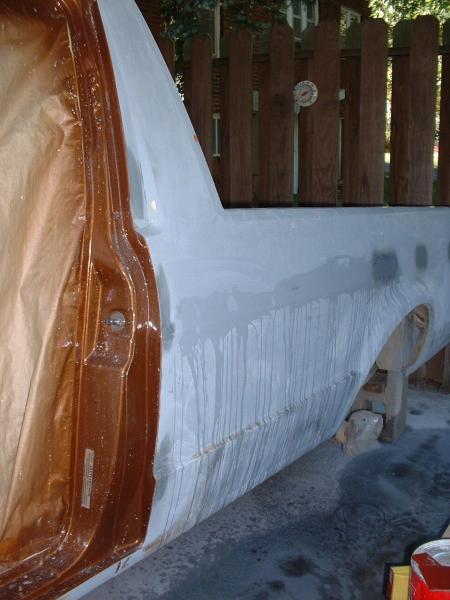
The worst of the overspray has been removed with 120 dry paper wrapped tightly on a small block of wood, and we're ready to start some finish sanding. The mess all over the side of the truck is the guide coat I told you about earlier, don't you dare skip this step. Notice the yellow hard plastic sanding block, little sanding stick, Scotchbrite, and loose sandpaper on the edge of the truck bed; I decided to knock everything down quick so the sandpaper is 240 grit wet paper which is actually too course but works fast to find what I'm looking for. More about that in the next photo.
You've probably noticed by now that I'm a big fan of stick and block sanding. Block sanding is an absolute must at this stage. If you have a rubber sanding block throw it on the floor as hard as you can, see how far it bounces, and don't retrieve it. It'll pick out some flaws, but a hard plastic or wood block will find all of them. A hard block, in conjunction with a guide coat, will pick out every low spot, high spot, sandpaper scratch, pin hole, or paint run no matter how small it is. Rubber sanding blocks cost me 4 times more work than actually needed doing until I learned what works best.
On anything except a high spot or pin hole try and see if it will block sand out. If you get into the bottom coat of paint, or metal, and the flaw remains you'll have to skim in some filler or spot putty. Spot putty is actually thick lacquer in a tube, like a toothpaste tube, and is used only for pin holes, sand scratches, and very shallow voids; otherwise use a finishing filler like the Putty-Cote mentioned before. 3M spot putty comes in a monster tube you couldn't use in a lifetime so find some Bondo brand in a smaller tube for about 1/4 the price; same stuff, thick lacquer.
Hey, did ya notice that cool door latch? It's polished and clear coated, shines like a diamond in a goat's grommet. Picky, picky, picky.
Block Sanding Final Primer
I once had a guy tell me, "I never block sand the final primer, I just palm sand it. What's wrong with that?" Actually nothing is wrong with that if you want your finish coat to look like a mirror... in a damned fun house. Block sand it!! Period.
Block sanding with a guide coat will find low spots no thicker than a piece of paper, palm sanding will only deepen it and cause a wave in the finish coat. When you hit a high spot you'll go through to the metal in nothing flat and you have to stop and look things over. Is it a sharp rise or a shallow one? Will primer and palm sanding fix it?
Look closely at the feather edge effect, (feathering), by this time you have at least a coat of primer and a guide coat on there. Is the bare metal spot small or large, like this -O- big around or this l---------l wide, or bigger? Are the feather edges from metal to one coat to the next this l-l wide or this l-------l wide? The wider the better on both counts. If you're at minimums you'll have to tap the spot down, fill it, and start again. Otherwise give it 4 or 5 coats of primer, aerosol is OK, guide coat it, and palm sand to a finish.
In this shot, what I wanted to find out fast was if the flat surfaces were as flat as I thought they were; and they were, almost. There were a couple of low spots that sanded right out, and some that feathered out good and wide. The low spots worked out with the block and the dark gray primer is covering the high ones. The dark spots of primer are OK with the color of paint I'm using. If a light color of paint was going on, I'd match the primer color or re-coat the entire primed surface with a light colored primer/sealer.
Damn, in too deep again. Now we've gotten into "color hold-out". Let's catch that at the bottom of the page.
Anyway, The tiny red spot on the back edge of the cap is spot putty over a pin hole, there were only 2 in the entire side of the truck. Another thing I wanted to find out quick was where the water is along the side of the bed. Was there actually a single break along there or a double one? I was nearly praying single, but you can't actually tell something like that until the final block sanding. (Single or double has to do with a modification I made to the side of the truck, you'll not have to contend with anything like that.)
The water is there because I wetted the area, got down at a low angle, and checked it out. Remember that from before? You look at your work, and you look at it, and you look at it until you're sick of looking at it; and, you look at it some more. Still you won't find a couple of flaws until your finish coat is on. But you know what? You're probably the only person who'll ever see them. They'll bug the crap out of you, but just keep your mouth shut and chances are nobody else will ever see them.
Back to the knock down with the 240 wet paper. Like I said, 240 is too course for finish work. There's a good chance it will leave some sand scratch that will show in the finish coat so lets eliminate that possibility. Normally I'd have done this step with 400 wet sanding so the next step is to wet palm sand everything with 400. It's OK this time because I know it's flat before I start. Next is to dry it off and pet the whole thing with a 3M # 7447 Scotchbrite pad and we're done
Getting Even Color
Now to address color hold-out. "Color hold out" is evenness of color in the final finish. It's not a problem you have to contend with when using dark colors or single stage, (no clear coat required), paints because their pigments are not translucent. When you get into light colored two stage paints, three stage pearl jobs, or new car paints it gets so critical that DuPont has 5 shades of primer sealer to deal with this problem.
Even with that, professional painters have to "shoot a color card" which is six or eight different shaded strips on a special paper card, match a stripe to the car, mix the paint, shoot a sample, and check that before doing a panel repair on most any modern car. Occassionally, the paint on some cars can't be matched even when you have the VIN and alternate color paint code. Many cars have up to 6 alternates of one color number; and, sometimes the codes just don't jibe with the car.
So, if you want a panel repair to actually match on your late model car take it only to a body shop that has a paint mixing station. Only the best ones do and their "shooters" are the ones who make the big bucks, because they deserve it.



talking with a mechanic about this today...
need ideas
regular practice to make it perfect biro
jodoh
Want to leave a comment or ask the owner a question?
Sign in or register a new account — it's free